Tips on How to Draw Animals

Drawing images of living beings is a difficult practice. The task becomes even tougher when it comes to recreating images of moving animals. However, realistic touch can be given to the image if you have an eye for detail and will to achieve perfection. Over the years, painters, cartoonists, and other artists of their ilk have been producing pictures of animals that are immaculate and admirable. But you don’t always need to be an artist to achieve perfection; it can always be attained through practice and passion.

Bird drawing

There are certain steps that, when followed, can help you draw various types of animals with ease. These steps are as follows:

  1. Firstly collect the relevant resource that will aid you in drawing the animal of your choice. It could include pictures or videos that are easily available to you. Now carefully try to analyze the anatomy of the animal. Try to figure out the shapes which comprise that particular animal. For instance, for drawing a cheetah, the prominent shapes include an oval head, triangular ear, and rectangular body. Once you identify different shapes you can practice making these shapes.
  2. Now with the use of a 2B pencil make the layout of the underlying shapes. During this process, you need to look for the shapes that might be overlapping. The figure of an animal is comprised of many shapes that usually overlap to form more complex shapes.
  3. Draw the basic shapes in light pencil and then erase those parts that overlap, to form the body structure of the relevant animal. Keep drawing the isolated segments of the animal and ensure that they are in sync with the other shapes of the body part. It is very important to see that different shapes connect smoothly.
  4. How realistic your drawing appears depends largely on how well you apply the tones. For this, you need to carefully study the lighter and darker tones in your reference and then go for shading as per the requirement. It is always better to apply gray tones using fewer strokes which are more suitable for drawing darker tones.
  5. Proper blending of tones is very important to achieve the desired result. You can make use of various blending tools that can help you highlight the realistic features in your drawing. Tortillon or tissue can be used for achieving smooth blending.
  6. Keep checking your reference illustration or photograph to ensure your details match with it. Carefully looking through the source, you can identify the areas where lighter tones are against darker tones and vice versa. You can always lift out the highlights with the tip of a kneaded eraser. You can also use a battery-operated eraser to highlight white specs on wild animals like deer.
  7. Continuing the process of blending, you can gradually bring out the different features of the animal, like legs, head, eyes, ears, and so on meticulously.

Tips to Remember

 Firstly master the outlaying process before progressing to more complex and detail features

 Make use of a pencil so that you can easily erase your initial mistakes.

Share Button

How to Draw a Teapot

Drawing is a funny creativity favorite of many. Teapot drawing is always starting with a basic shape and easy steps with descriptive detail. Children usually learn to draw through some simple steps. Hence, teapot drawing is one of the best among other hard patterned drawings. So, make it by following a few useful hints given under:

Imagine the shape of the teapot

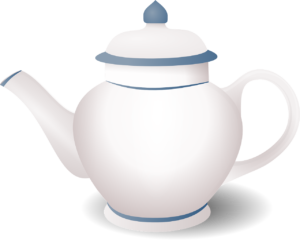
Teapot drawing

Sit for some minutes and imagine how a teapot really looks. Own creativity and mind exercise give a new platform to every drawing. So start thinking about the original shape and try to portrait it on paper. The basic things required for making teapot drawings are paper, pencil or crayon, color, outliner, and any reference if you want. Collect these items before you start making them.

Draw the shape of the pot

Start drawing the important step. Make a shape, which looks like a big oval. The large ovals are for the center part of the teapot. Draw another two oval rounds nearby the large oval. The other two ovals must be a little more oval in shape than the larger one. These circles use for the handles of the teapot. Make a base of it. Draw a little wider and flat shape oval. Draw the upper part like one more oval putting upper side of the body part. If a person needs a closed teapot drawing then it is necessary to cover the pot by drawing its upper part and oval attach to it.

Draw base of the teapot

Start drawing the lower part where the teapot stands. Start sketching the main shape, which is the big oval. These are more circular than a normal oval, and if you can, make the bottom a little wider than the peak. Begin to draw the line for the aperture at the top. Draw the little circle at the top. Anyone can get a similar drawing like small papaya. The vegetable looks a little bit like a teapot center part.

Draw handles

Draw the handle of the teapot. Draw two vertical lines. Begin with straight from the middle part and slightly narrower towards the end. Join the top edge with a sharp outliner. Make it natural and simple. Draw another circle on the opposite side of the vertical lines for another part of the teapot. These could be small handles. Once the drawing process has been completed draw an outline in it. Outline often gives prominent look to the drawing. As a teapot is a very simple drawing, make it clear and natural by giving a broader outline. It will look more expressive and real while made for children.

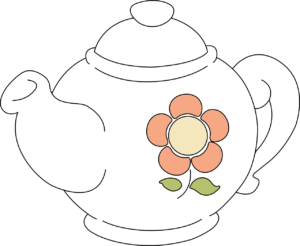
teapot floral

Add some designs

Add some designs like floral patterns and dots in front of the teapot. Add dots with different color combinations to make it attractive. Maybe put some watercolor painting design upon it. The pot must look beautiful and unique even if made at home. Make the teapot colorful, if you make it for small children. Children always love color and become happy with coloring it.

Some people think teapots bought from a market look more finished and attractive. However, apart from this misconception, one can easily make gorgeous and lovely teapots at home.

Share Button

How to Draw a Cartoon Cat

Plenty of kids love making cartoon cats for sure amusement. It can instigate them to use their imagination. Animals are famous for having embellished expressions and truly distinct personalities. So drawn features of a cartoon cat often show human-like characteristics. While creating your drawing, ensure to take on each part separately to create a more finished product. However, building a carton cat may not be a difficult task if someone follows the needful hints given below:

cat drawing

Draw the face

Start the art effort by drafting the rectangles. Drawing the basic cat face leads to lots of fun and enjoyment. Take a piece of paper. Draw a large oval in the middle of the paper. Imagine the basic shape and size of the drawing and make final how long the art will be drawn. Try to make it a little narrower on top of the face. It may be small or large enough to hold the animal’s face. Now, draw another oval shape slightly smaller than the first one overlapping the lines consequently the bottom line of the original oval. Remove all overlapping lines attached to the foundation of the second oval and generate the head of the cartoon cat. Produce a tongue by drawing a dappled shape in the mouth.

Draw a cartoon-like smile

Draw a smile just beneath the nose of the cat. Then draw an upside-down smile towards the ending of the chin. Create two vertical lines that hook up the smile lines mutually to construct a sketch of the mouth. Draw eyes at the crest and ears surrounded by the rectangle. Shade in a black spot in the focus of each eye to compose the pupils. Now, build three crescent-shaped lines that protrude from the cat’s face to create the genuine fuzz. Represent four small pointed triangles to signify teeth in the cat’s mouth with two on the underside and two on the apex.

Draw legs, nose and mouth

Prolong the drawing by adding four legs. The front leg must be smaller than the back one. Affix particulars like the eyes, nose, mouth and the whiskers. The back legs are strong and give depth while drawing. Draw a string of thin triangles on each side of the head right where the head meets with the face. These are pieces of the whiskers and entail a fuzzy face. Ever since the cat is a slinky these modest creatures are stirring very much in vein of a lion or tiger. At the end, the tail is finished with a little rectangle.

Color the cat

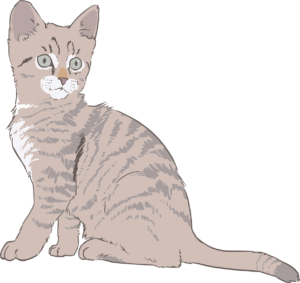
colored cat drawing

Flush the cartoon with some delightful colors. Give appropriate color with neighboring mouth and face area. Someone may create a very essential-looking cartoon cat by outline in deep contrast color for any toddler choice. Look upon every outline and be submerged with the pattern of art carefully. Color the cat in such a way that attracts the kids from every angle and gives them a huge satisfaction. Draw with some kidding attention. Therefore, it will look crazy and delightful.

Anyone can draw a cartoon cat within a couple of minutes by going under the surface crumb ahead of drawing the lines.

Share Button

How to Draw Anime Faces

Before we go deep into the details of drawing anime faces, let us first have an idea about what does the term anime actually mean. The term anime actually suggests a kind of animation that originates from Japanese Manga comics. Since it has gotten its inception from comic books, it is hugely popular among young people. Kids like drawing anime faces very much. The drawing of anime faces can provide children with the much needed creative outlet. Anime faces with their pointed features, quirky angles, colorful and cartoon like illustrations can be real fun to draw. In this article we shall know the steps that are involved while drawing anime faces. Have a look at the below mentioned points that can make your task easier and simpler:

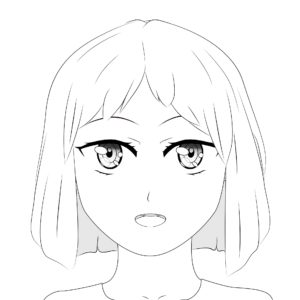
Anime Face
  • You have to begin by drawing a circle for the head of your anime character. Try making it as big as you want the head of your anime character to be. Here you have to be as creative as you can. This will make your anime character very fun to look at. However you have to keep one thing in mind at this point: You have to keep the top of the head open while drawing the circle. This is because you will be drawing the hair in this place.
  • The next step in drawing the anime face is to extend this circle downwards. Extend the bottom of the circle downwards from the bottom of the chin which extends from one side of the jaw area to the other area. It is completely your choice whether you want to make the extension of the chin either pointed or rounded. Basically you will have to be very imaginative and creative. Make sure that your anime character becomes very lively to look at.
  • Now you have to deal with the placement of the facial features of the anime face. For doing so, you have to sketch in a set of crossed lines in the anime face. Make sure that the vertical line that you draw follows the curve of the left side of the head. You also have to take care that the horizontal line is drawn approximately one third to one half of the way starting up from the chin. However this will entirely depend upon the amount of hair that you want on the head of your anime character. Here you can also add neck lines to the left of the chin and to the far right of the jaw line. However it depends on your personal choice completely.
  • Now you can draw the eyes of the anime character. This has to be drawn along the horizontal guideline. You have to take care that the anime eyes take the shape of a rectangle that has slightly rounded sides. You can make the iris large in size or else you can choose to make the pupils of the eye very dominating in the eye. You can also make small white circles in the eye that represents the light reflecting on it.
  • The nose can be drawn by drawing out a curved/slightly pointed line. However you have to take care that you begin the top of the line at the level of the bottom of the eyes. Incase you desire, you can also add a nostril to the nose by making a dot.
  • We will now focus on making the mouth of the anime character. You can either draw a simple line or else if you want to draw an open mouth, then you can draw a curved line with a half circle attached to the bottom.
  • Let us now add hair to the anime character’s head. You can either add soft and flowing hair or else draw wild and spiked hair. If you want to accessorize the anime character that you are drawing, proceed on to add a ponytail or head bands etc.
  • Lastly you have to erase off all those guidelines that you had drawn earlier. Color your anime character in the colors that you desire.
Share Button

How to Draw a Caricature

Caricatures are basically those typically unflattering and funny pictures that we buy from amusement parks. However with some practice one can master the art of drawing caricatures yourself! This will save you from being subjected to the satire of the caricaturist and also will provide you the immense satisfaction of drawing caricatures of your family and friends. So here we shall know more about the method of drawing caricatures step by step. The guide given below can help in making the task easier and simpler for you:

Abraham Lincoln caricature
  • First and foremost is studying the basics of caricature. Observe good caricatures and analyze the variations in the thickness and darkness of certain lines. In fact it is these differences in the thickness and darkness of lines in a caricature that can bring life in a portrait.
  • You shall have to plan to layer caricatures that feature more than a single subject. You can also plan to compose the caricature by placing people in front of the other or by drawing them in shortest to tallest order. This way you can add dimension and interest in your caricature portrait.
  • Observe your subject very closely. Though you will need to enhance his/her features but you have to be careful that your caricature resembles the subject very closely.
  • You can then draw the eyes in a thick dark line by keeping in mind about the relative distances of your subject’s features. Remember that eyes are the most expressive part in any face so it is better if you begin by drawing the eyes first.
  • The next part is the nose. You can choose to exaggerate the nostril features of your subject. Make sure that the side of the nose is lighter than the nostril line.
  • You have to then draw the mouth by using a heavy line for denoting the place where the lower lip and lips meet. You can choose to exaggerate the mouth features depending upon the personality of your subject. Tip: draw a huge smile for a friendly subject.
  • You have to draw the chin of the subject by observing the length and proportion of the chin. If your subject has a small chin then you can draw it in such a way that the bottom lip rests on the top of the chin.
  • For the jaw line and cheeks, you have to draw a continuous line by using a thick and dark line. Only if your subject has angular features, you can consider drawing the cheekbones.
  • Drawing the ears can be fun. You can experiment with the ears by either sticking them out or by hanging them down too low.
  • The hairline and the hair have to be drawn by using a pencil. For people with large foreheads, you can begin the hairline high on the head. For people with puffy hair, you can draw hair that fills the top of the page.
  • The next in line is the addition of eyebrows by using a thin light line for all people who have few eyebrows and using thick caterpillars for people with thick eyebrows.
  • You can now add the finishing touches to the caricature by drawing any of the unusual features like moles, wrinkles or under eye bags.
Share Button